

Bee Swarm Simulator features a wide variety of enemies that players commonly refer to as mobs. These mobs are a core part of progression, as they drop tokens, items, and rare rewards needed for quests, gear, and hive upgrades.
Understanding how mobs work and knowing which ones you are facing is essential if you want to level up efficiently and take on tougher challenges later in the game.
This guide covers all mobs in Bee Swarm Simulator, how they function, and how they are categorized.
How Mobs Work in Bee Swarm Simulator
Every mob in Bee Swarm Simulator has a level, which is displayed next to its name. This level directly affects combat:
-
If your bees are lower level than the mob, they will miss attacks more frequently
-
The larger the level difference, the harder it becomes to deal damage
-
Higher-level bees hit more consistently and defeat mobs faster
Most mobs become hostile when you enter their field, while a few are passive and will not attack unless provoked.
When defeated, mobs usually drop tokens on the ground instead of placing rewards directly into your inventory. Your bees must collect these tokens. Other players cannot steal your drops unless the mob is a public mob, such as Mondo Chick.
A useful trick against many field mobs is jumping repeatedly after your bees start attacking. This can cause certain mobs to stop moving or attacking, making fights easier.
All Mobs in Bee Swarm Simulator
Mobs in Bee Swarm Simulator are divided into four main categories:
- Regular Mobs
- Mini-Bosses
- Bosses
- Miscellaneous Mobs
Each category plays a different role in progression.
Regular Mobs
Regular mobs are field-based enemies that respawn after a cooldown. These are usually the first mobs players encounter and are tied closely to early and mid-game quests.
They appear in specific flower fields and have predictable behavior.
Regular Mobs include:
| Mob | Image | Fields | Respawn Time | Health | Honey Drop |
| Ladybug |
 |
• Mushroom Field (Lv 1)• Clover Field (Lv 2)• Strawberry Field (Lv 2, 3) | 5 minutes | 12-28 | 75 |
| Rhino Beetle |
 |
• Blue Flower Field (Lv 1)• Clover Field (Lv 2)• Bamboo Field (Lv 2, 3)• Pineapple Patch (Lv 5) | 5 minutes | 10-34 | 75 |
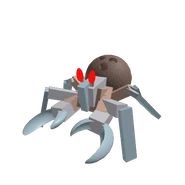
| Spider |
 |
Spider Field | 30 minutes | 100 | 1,000 |
| Mantis |
 |
• Pineapple Patch (Lv 4)• Pine Tree Forest (Lv 5, 6) | 20 minutes | 115-165 | 250 |
| Scorpion |
 |
Rose Field | 20 minutes | 170-200 | 1,000 |
| Werewolf |
 |
• Cactus Field (Lv 7)• Pumpkin Patch• Pine Tree Forest | 1 hour | 250 | 5,000 |
These mobs are ideal for farming basic drops, tokens, and quest requirements.
Mini-Bosses
Mini-bosses are stronger than regular field mobs but do not qualify as full bosses. They often have unique mechanics, higher health, and better loot.
Mini-bosses usually have longer respawn timers and require more preparation.
Mini-Bosses include:
| Mob | Image | Level Range | Fields | Respawn Time | Health | Main Attack |
| Rogue Vicious Bee |
 |
1-12 | • Clover Field• Spider Field• Cactus Field• Rose Field• Mountain Top Field• Pepper Patch | 10-30 minutes | Different for each level | Spike attacks and spawns at night more often. |
| Wild Windy Bee |
 |
1-20+ | All fields except Stump Field and Ant Field | Every two-day/night cycles or from the Wind Shrine | Different for each level | Two wind attacks, a tornado, and a wind gust. |
| Commando Chick |
 |
3-25+ | Commando Chick’s Hideout | 30 minutes | Different for each level | Throws grenades, egg block defense, and HP saves. |
| Snowbear |
 |
1-25+ | Spider Field | 1 hour 30 minutes | 1,500 – 200,000 | Level scales, 1-minute time limit, no HP saves. |
These enemies are often required for mid-game quests and progression checks.
Bosses
Bosses are the most powerful enemies in Bee Swarm Simulator. They feature high levels, large health pools, and exclusive rewards.
Boss fights often require:
-
High-level bees
-
Proper hive composition
-
Strategy and patience
Bosses include:
| Boss | Image | Fields | Respawn Time | Health | Main Attacks | Honey Drop |
| King Beetle |
 |
King Beetle’s Lair (Lv 7) | 1 day | 2,500 | Melee | 1,000,000 |
| Tunnel Bear |
 |
White Tunnel (Lv 9) | 2 days | 10,000 | One-shot kill | 5,000,000 |
| Mondo Chick |
 |
Mountain Top Field (Lv 8) | 1 hour | 300,000 | Egg block defense, loses 333 HP per second. | TBA |
| Coconut Crab |
 |
Coconut Field (Lv 13) | 36 hours | 250,000 | Coconut throw, claw attacks. | – |
| Stick Bug |
 |
Multiple fields (Lv 1-25+ | When the challenge starts | 1,250-2,585,000 | Flailing sticks, splinter trap, stick nymphs, spinners. | – |
| Stump Snail |
 |
Stump Field (Lv 6) | 4 days | 30,000,000 | Doesn’t attack unless you touch its head, HP saves. | 30 |
Defeating bosses is one of the best ways to earn rare items and late-game upgrades.
Miscellaneous Mobs
Miscellaneous mobs are special enemies that do not fit neatly into other categories. They may spawn under unique conditions, appear temporarily, or serve special roles.
These mobs often surprise new players due to their unusual mechanics.
Miscellaneous Mobs include:
| Mob | Image | Fields | Main Features |
| Aphids |
 |
All fields except Ant Field and Stump Field (Lv 1-20) | • Rage Aphid: Massive damage.• Armored Aphid: Greater defense.• Diamond Aphid: Greater health. |
| Army Ant |
 |
Ant Field (Lv 1-16) | Higher defense and targets the player. |
| Bean Bug |
 |
Randomly appears in all fields except Ant Field | Summons Jelly Bean tokens. |
| Cave Monster |
 |
Werewolf’s Cave (Lv 11) | 400 HP, one-shot kill. |
| Cogmower |
 |
Any field except Ant Field (during Robo Bear Challenge) | Roams destroying flowers, 50 damage on contact (increases with level), takes half damage from critical hits. |
| Cogturret |
 |
Any field except Ant Field during Robo Bear Challenge (Lv 11-22) | Shoots giant cog destroying flowers and dealing 25 damage, sinks underground after shooting. |
| Festive Nymph |
 |
• Sunflower• Clover• Strawberry• Bamboo• Pineapple• Cactus• Pumpkin• Mountain Top (Lv 1-25+) | Special Stick Nymph variant from Stick Bug Beesmas Quests, loses health over time. |
| Fire Ant |
 |
Ant Field during Ant Challenge (Lv 1-16) | Doesn’t target player, leaves fire trail that lingers. |
| Firefly |
 |
• Strawberry• Spider• Bamboo• Pineapple• Cactus• Rose | Nighttime only, creates sparkles on flowers, spawns in groups of eight. |
| Flying Ant |
 |
Ant Field during Ant Challenge (Lv 1-16) | Moves fast, larger attack range, targets player. |
| Frog |
 |
All fields, can spawn outside fields | Creates bubbles, collects tokens, attacks hostile mobs, has stronger gifted version. |
| Giant Ant |
 |
Ant Field during Ant Challenge (Lv 1-16) | Large health and damage, targets player. |
| Golden Cogmower |
 |
• Clover• Pineapple• Pumpkin• Mountain Top during Robo Bear Challenge (Lv 6-22) | Rare mob, spawns only 3 times per challenge (rounds 3-4-6, 12-13-14-16, 21-22-23-24), only Robo Bear mob that drops loot, takes half damage from critical hits. |
| Mechsquito |
 |
Anywhere including outside fields during Robo Bear Challenge (Lv 1-24) | Shoots projectile barrage giving Mechsquito Toxin debuff, deals contact damage. |
| Mega Mechsquito |
 |
Any field including outside fields during Robo Bear Challenge (Lv 13-23) | Shoots 6 projectiles giving Mechsquito Toxin debuff, deals contact damage, long cooldown between shots. |
| Puffshroom |
 |
All fields except Ant Field (Lv 1-30) | Spawns naturally at 0:15 and 0:45 past the hour or from planters, comes in different rarities, defeated by collecting pollen nearby. |
| Party Cogmower |
 |
All fields except Coconut and Ant during Robo Party (Lv 1-28) | Roams destroying flower patches. |
| Party Cogturret |
 |
All fields except Coconut and Ant during Robo Party (Lv 5-27) | Shoots giant cog destroying flowers, sinks underground after shooting. |
| Party Mechsquito |
 |
All fields except Coconut and Ant during Robo Party (Lv 1-28) | Shoots projectiles giving Mechsquito Toxin debuff, deals contact damage. |
| Party Mega Mechsquito |
 |
All fields except Coconut and Ant during Robo Party (Lv 11-27) | Shoots 6 projectiles giving Mechsquito Toxin debuff, long cooldown between shots. |
| Regular Ant |
 |
Ant Field during Ant Challenge (Lv 1-16) | Doesn’t target player. |
| Stick Nymph |
 |
• Sunflower• Clover• Strawberry• Bamboo• Pineapple• Cactus• Pumpkin• Mountain Top (Lv 1-25+) | Only summoned by Stick Bug, health scales with Stick Bug level, loses health over time. |
| Zombie |
 |
Retro Swarm Challenge (Lv 1-25+) | Temporal enemy. |
| Slime |
 |
Retro Swarm Challenge (Lv 1-25+) | Temporal enemy. |
Some of these mobs are tied to events, quests, or hidden mechanics.
Final Thoughts
Bee Swarm Simulator has a massive variety of mobs, each designed to test your progression at different stages of the game. You will naturally start with low-level regular mobs, then gradually work your way up to mini-bosses and full bosses as your bees grow stronger.
Learning mob mechanics early makes quests easier, farming faster, and boss fights far less frustrating. As you improve your hive, revisiting tougher mobs will unlock better rewards and faster progression.
For deeper mechanics, strategies, and updates, keeping track of all mob behavior is key to mastering Bee Swarm Simulator.

Hi, I’m Ankit Kumar, the founder of StealthyGaming. I handle everything from SEO to researching and writing gaming articles. I’m passionate about helping fellow gamers stay updated with the latest tips, guides, and news. When I’m not optimizing content, I’m probably testing out new games or digging into strategies to make my articles as helpful and engaging as possible.