
The Screaming Vault Ruins is one of Crimson Desert’s trickier Ancient Ruins puzzles — not because it’s hard, but because most players can’t find the entrance, get wrecked by the traps, or can’t figure out why the Abyss Cresset won’t activate after setting the dials. This guide covers all of it, fast.
Where to Find the Screaming Vault Ruins
The Screaming Vault is in the Demeniss region, inside the Golden Plains area of Azerian Estate, west of Rustleleaf Farm. On your map it appears as a Mysterious Energy marker.
Two things to know before heading there:
The Demeniss region stays hostile and unmapped until Chapter 8 of the main story.
You’ll also need to ring the Toll of Demeniss — found at the top of the tallest clocktower in Hernand City — to reveal the full regional map first.
Once you’re in the area, the entrance isn’t obvious. Look for a hidden opening in the ground among the ruins. If you’re struggling to spot it, activate Blinding Flash — it makes nearby Mysterious Energy markers glow visibly, pointing you straight to the hole.
Getting Inside – Survive the Traps
Drop down the ladder into the underground vault. Before you reach the puzzle chamber, you’ll pass through a trap corridor with two hazards: arrow volleys firing across the room, and floor spikes.
The arrows don’t fire continuously — they fire in volleys with roughly two seconds between bursts.
Count the rhythm, then dodge roll forward to clear both the arrows and the spikes in one smooth run. Don’t sprint blindly — one roll timed right gets you through clean.
Quicksave before descending. If the traps catch you off guard, you won’t have to run back from a checkpoint.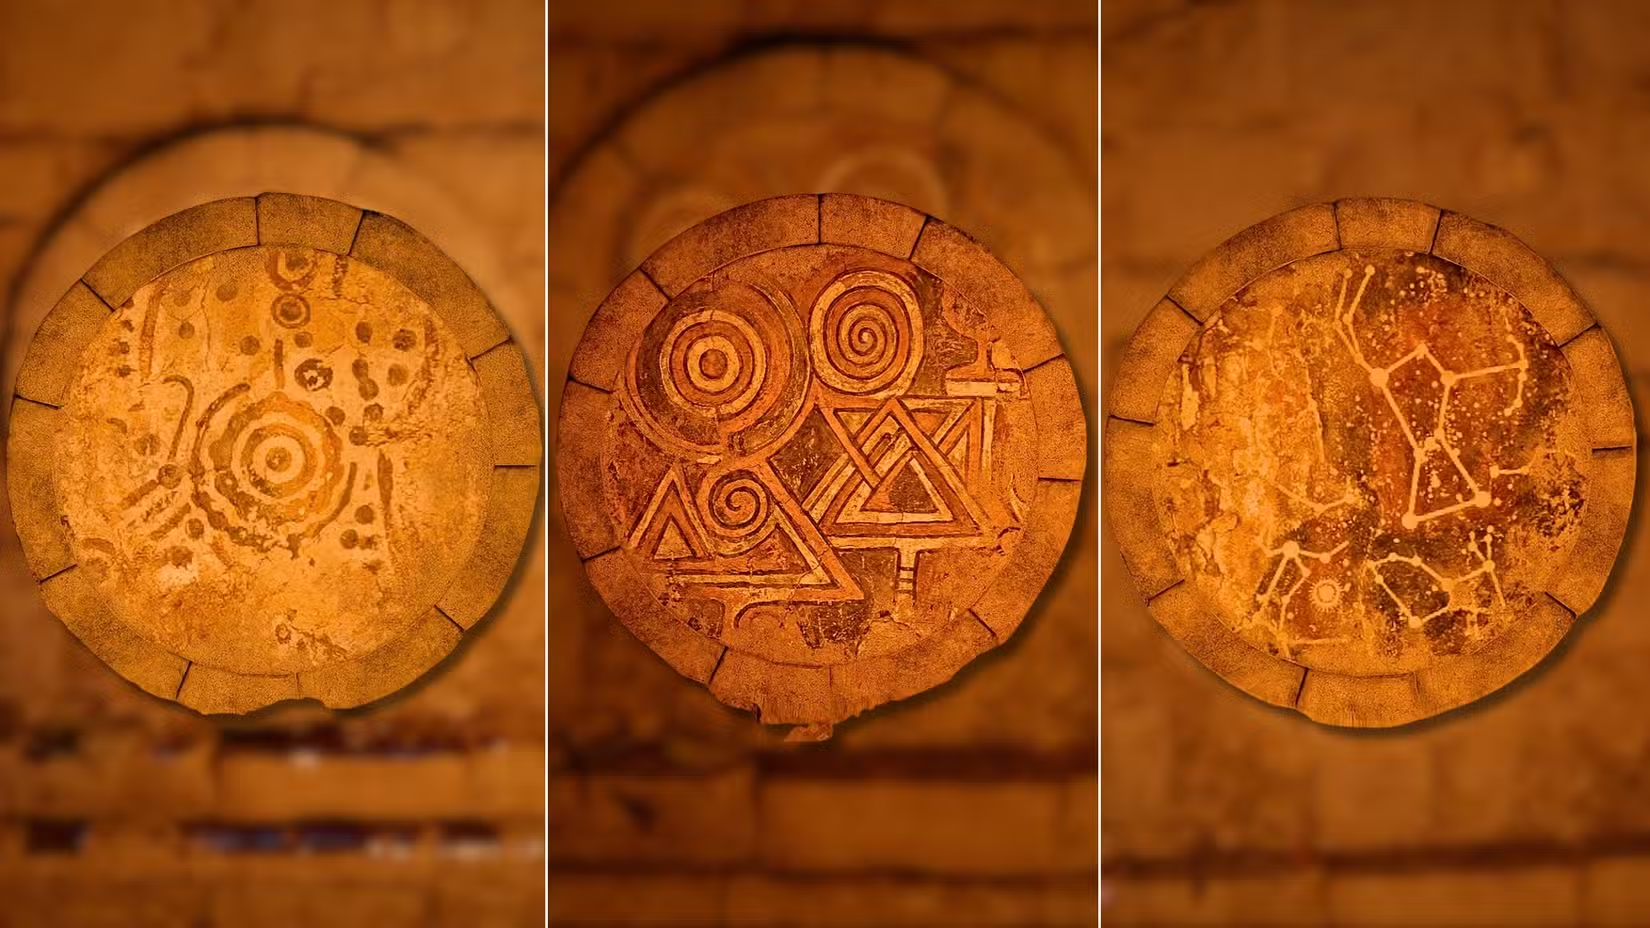
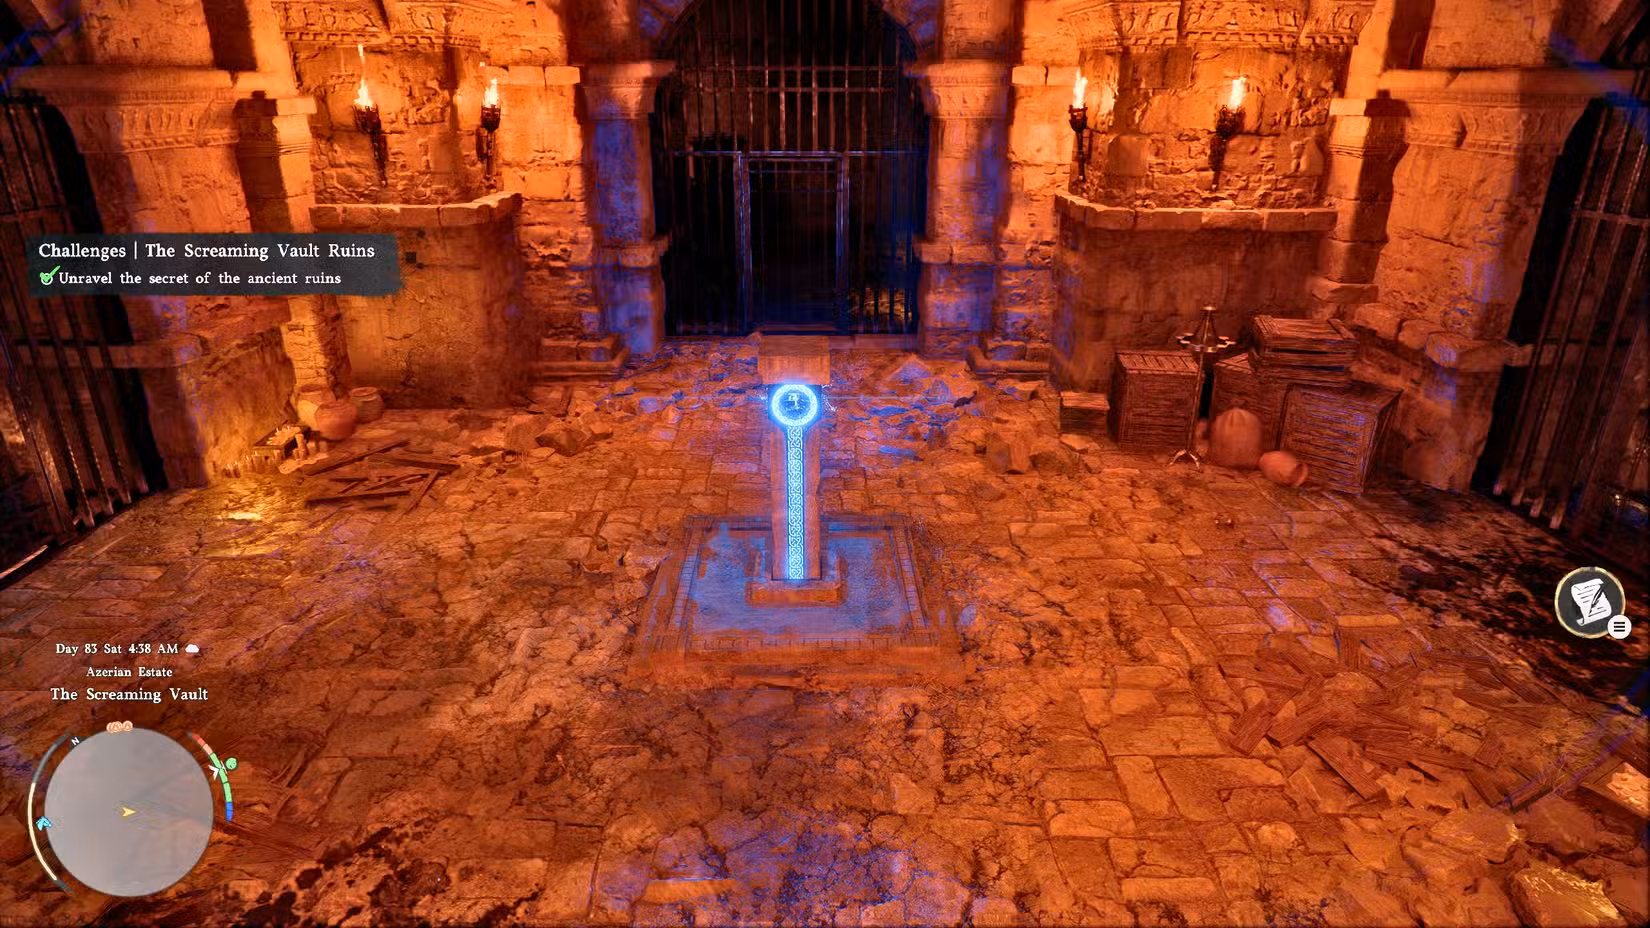
Inside the Vault – Understanding the Puzzle
The main chamber has a disabled Abyss Cresset in the center and three jail cells, each containing a rotating dial with symbols on it.
Your job is to set all three dials to the correct orientation simultaneously to activate the Cresset.
To rotate a dial, stand in front of it and use your Stab ability (RB + Y on Xbox / R1 + Triangle on PlayStation).
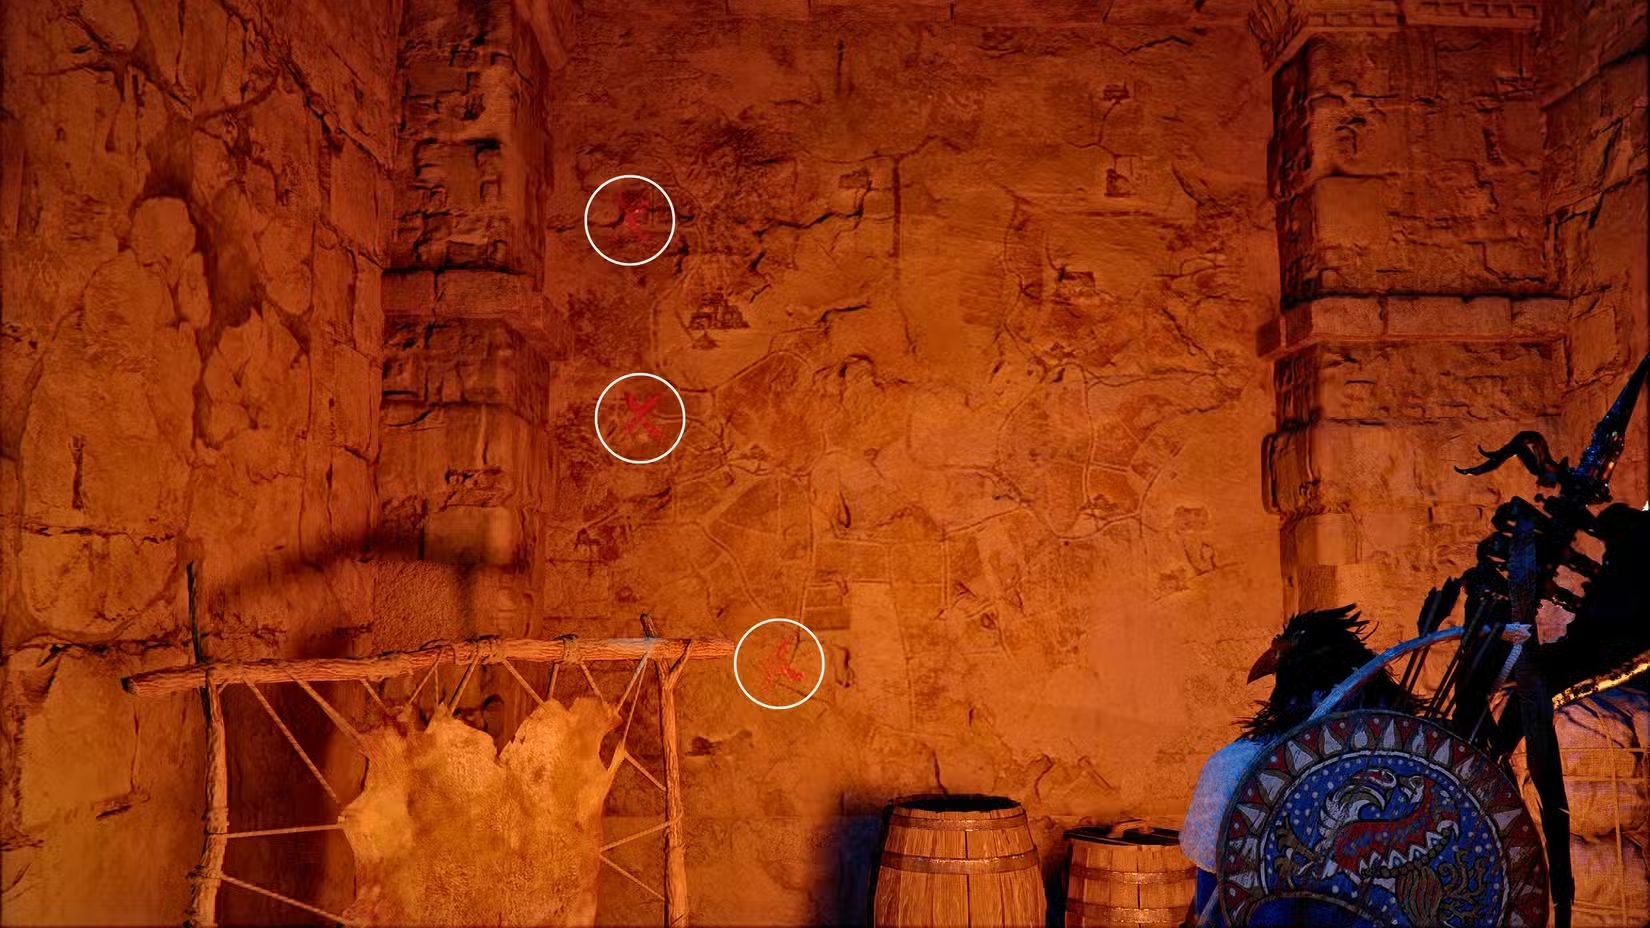
The Scarecrow Clue System (Optional)
Inside one of the jail cells, there’s a mural on the wall showing a map of the Demeniss farmlands with three marked locations.
Each location has a scarecrow with a painted symbol that shows the correct dial orientation.
You don’t have to do this. It’s the game’s intended discovery method, but if you just want the solution, skip straight to the next section.
If you do want to find the scarecrows, screenshot the mural before leaving the vault — you’ll need it.
Exact Dial Solution (No Scarecrow Hunting Required)
Stand facing the Abyss Cresset in the center. Here are the correct orientations for each room:
Left Room Dial — The symbol looks like a swirl or lollipop shape. Rotate it so the vertical bar sits just past the 11 o’clock position, with the hook-like part facing left at 9 o’clock.
Middle Room Dial — The simplest of the three. Rotate until the two circles sit on top of the triangles.
Right Room Dial — The symbol resembles an archer’s constellation. Rotate it so the bow faces to the right at the 3 o’clock position.
Once all three are set correctly, the Abyss Cresset in the center of the chamber will activate on its own.
Abyss Cresset Not Activating? Here’s Why
This is the most common problem players hit. If the Cresset isn’t lighting up, one of your dials is slightly off – even a few degrees of misalignment is enough to stop it.
Go back to each dial individually, look closely, and make small adjustments.
The order you set them in doesn’t matter — only the final position of all three counts.
Rewards
Interact with the Abyss Cresset once it activates. You’ll receive:
- Abyss Artifact — used for upgrading equipment, unlocking skills, and boosting stats
- Memory of Turbulence — reveals unknown locations on the map and unlocks Abyss-related knowledge entries
- Fast Travel Point — permanently unlocks the Screaming Vault as a fast travel location, very handy for navigating southern Demeniss
Quick Tips Recap
- Activate Blinding Flash near the ruins if you can’t find the entrance
- Quicksave before dropping in
- Traps follow a rhythm — dodge roll, don’t sprint
- The dial order doesn’t matter — only the final positions
- If the Cresset won’t trigger, check for slight misalignment on each dial
That’s everything you need. Find the vault, survive the traps, set the three dials, grab your Abyss Artifact and fast travel point, and move on.

Nishant Singh is a gaming writer with a passion for Roblox and the Call of Duty franchise. He enjoys exploring new titles, sharing tips, and writing stories that bring the gaming world to life.