
When a TV won’t display an Xbox console’s signal even when both the TV and console are turned on and all the necessary connections are connected, it is known as the Xbox Series S “No Signal” issue.
You should fix Xbox HDMI if it stops working when you see a “No signal” notice, static, or a blank screen. The HDMI connection is essential for the Xbox to function. It implies that harm to the console’s output mechanism might make it worthless. Additionally, what you see on the screen can give you the impression that the issue is much worse.
While certain TV models may show static or a blank screen, others may display the phrase “No Signal” or “No Signal Detected” as an on-screen text warning. Here is our guide on Fix: Xbox series s HDMI not working. So, let’s get started.
Reasons: Xbox Series S HDMI not working
Short Answer: The HDMI not working issue on Xbox Series S occasionally results from a firmware bug that prevents the console from overriding the TV resolution. However, you can also have this issue if you unintentionally connected the TV to the HDMI In port rather than the HDMI Out port.
After an upgrade, a small bug in the Xbox Series S’s operating system or hardware frequently causes errors of the “No Signal Detected” variety. The Xbox Series S HDMI not functioning correctly and simple human mistake when it comes to connecting the necessary cords to the relevant ports can both be problems.
The issue might be brought on by flaws and vulnerabilities in the system firmware. It often occurs following software updates. The problem might also be caused by physical harm. Since you could only replace the console’s hard drive, it’s the most difficult to fix. Other components include motherboard chips connected to the HDMI port.
The Xbox may not be able to send a signal due to faulty wiring. Most frequently, a malfunctioning hard disc is the cause of the issue. Additionally, the output must be in a sound state. For instance, corrosion and filth prohibit it from performing as it should. You would need to take it to a retailer for a replacement if the damage was beyond repair.
The resolution you set on the Xbox must be supported by the cable, the display, and the AVR system hooked into your TV and Xbox. Blank displays and other problems will result if this is not the case. For instance, if you just updated your TV, the display might not be able to handle the resolution as it is set up right now.
You would also need to be aware of the symptoms of Xbox HDMI issues. These are the signs of damaged Xbox HDMI.
The Xbox displays a “No Signal” warning, static, a dark screen, or a glitchy screen. Another possibility is a screen that alternates between blue and black. Alternately, the system activates and functions. However, the display might suddenly become blank. The console may also show a message such as “Game console (is it on?)” on the screen.
Fix: Xbox Series S HDMI not working
Here are all the finest and most reliable fixes for TVs that won’t recognize your Xbox Series S console. Each repair is mentioned according to its level of complexity, and it is advised to do each one in turn.
-
Method 1: Check your Xbox console
When the Xbox logo button is pressed, the wireless controllers for the Xbox occasionally become independent of the device and turn themselves on. Verify that the Xbox logo is illuminated on the Xbox One system. Press it to manually turn on your console if it isn’t already on. Your wireless Xbox controllers could require a new battery or a recharge if they won’t turn on.
-
Method 2: Check the HDMI cable
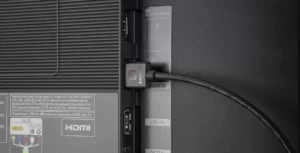
Before continuing, try these simple remedies. You might be able to save some time if they work. Verify that the TV and console are both connected to the HDMI wire completely. When the connection joins, there ought to be a “click” sound.
Examine the two HDMI ports for stains or evidence of damage. You may blast dirt off with a blowtorch or brush it off. You would need to try a different port or replace it if there was damage (such as bent pins).
Verify that the HDMI ports are not slack. You would need to use a different one (on the TV) or swap out the Xbox one. To make sure the cable is functional, test it with other devices. Alternately, test the console with a different HDMI cable.
Verify that the correct input channel is selected for your TV. Verify the HDMI cable is connected to the console’s “out to TV” port. When you turn on the Xbox, make sure the LED light on the power brick is on.
If you’re playing on the Xbox Series X in 4K, you may require an HDMI cable 2.1. HDMI 2.0 and HDMI 2.1 cables may be used with the Xbox Series S, Xbox One X, and Xbox One consoles. And last, HDMI 1.4 cables could also function with the Xbox Series S.
-
Method 2: Examine the Xbox One power brick
You probably noticed the external power brick that connects your original Xbox Series S to the wall outlet if you have one. If the LED light on the brick is functioning correctly, it should be white. If it’s orange or red, unplug the brick from your wall and console, wait five minutes, then plug it back in. Then turn on your Xbox One normally.
-
Method 3: Reset the console’s power
A power cycle is an effective approach to remove errant bugs that are impacting the system. By holding down the power button at the console’s front for around 10 seconds, the console may be turned off.
For a minute, unplug all of its cords. In case there was a power surge, it allows the power adapter to cool down. Additionally, it uses up the supply’s remaining power. Reconnect the wires. By pushing the Xbox button on the controller, you may turn the system around.
-
Method 4: Activate Low-resolution Mode on the console
Starting the console in low-resolution mode is another typical fix. You may use it to restore the display settings on your console. Turn the Xbox One while pressing the Eject button to remove any discs that may be inside.
Then, to turn it off, press and hold the Power button at the front for 10 seconds. After turning it off, hold down the Power and Eject buttons until you hear a second beep, which should happen after approximately 10 seconds. The first beep will be followed by the power light flashing. After then, release your grip on the buttons.
There is no Eject button on the Xbox One S All-Digital Edition or the Xbox Series S. The Xbox button on the console must be pressed while holding the Pair button as well.
The Xbox is launched in low-resolution mode during the procedure (640 x 480). When you hear the second beep, try connecting the HDMI cable if the procedure doesn’t work. The procedure aids in the Xbox’s issue fixes and setting resets.
To access the instructions, press the Xbox button. Click on Profile & System. Access Settings. Visit General. Pick your TV and display options.
Select the display resolution. You may choose between 720p, 1080p, or 4K UHD. We advise choosing Auto Detect because it’s possible that your previous setting selection was incorrect and caused the issue.
-
Method 5: Repair or replace your Xbox device
If your warranty is still in effect, your final recourse may be to request Microsoft to repair or even replace your Xbox One system without charge. On the official Xbox Support website, you can determine whether your system is still eligible for repair or replacement.
-
Method 6: Disconnect All External Devices
The black screen might be brought on by external devices such as USB HDDs, Storage Expansion Cards, AVRs, Blu-ray players, microphones, or battery charging stations. This occurs as a result of the console trying to update but encountering device overload.
Try unplugging all of your external devices if you’re using them, leaving only the HDMI cable, the power wire, and the Ethernet cable connected (if you use one).
That’s it with our today’s article on Fix: Xbox Series S HDMI not working. Do try all the sections and tell us your favorite. Till then, stay safe and follow us for more upcoming coverage.
Follow us on Twitter & like our Facebook page for more post-updates.
Check out more –

An experienced gaming content writer who emphasizes on offering the most recent information and how-to tutorials for the trending titles. Being a Hardcore gamer himself, he likes to try an array of games and likes to spend his time exploring them. He likes to unwind by listening to R&B music when he’s not writing about gaming stuff.