

Last updated on January 2nd, 2023 at 05:28 pm
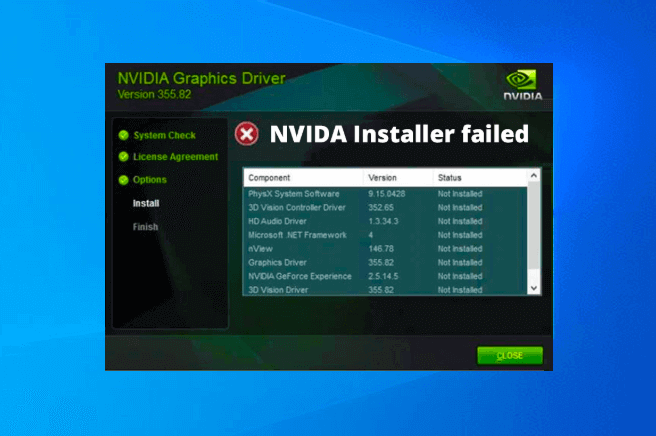
When installing the NVIDIA graphics driver on Windows 10, there are frequent issues with the NVIDIA installer that result in errors like “The Standard NVIDIA Graphics Driver Is Not Compatible with This Version of Windows.”
Many customers are saying that they receive the “Nvidia Installer Failed” problem while trying to install their Nvidia drivers, either for the first time or when updating their current drivers. Users who just upgraded their Windows OS to Windows 10 frequently get this issue.
This issue may be quite problematic for users as having the most recent GPU drivers loaded on your computer is essential for its effective functionality.
The most common reason of this is an outdated or incompatible driver that has been installed on the user’s PC. Don’t worry if you are having the same problem. Simply try these remedies on your smartphone, and the issue will be resolved quickly.
Here is our guide on (2022) Fix: Nvidia driver install failed Windows 11/ 10.
Why is Nvidia driver install failed Windows 11/ 10
Short Answer: Although the precise cause of this error might vary, it is typically linked to problems with outdated system files or drivers.
-
1. After Windows Installation
Users typically see this problem after installing the new Windows 10 OS. They do this because Windows is upgrading its files in the background as they attempt to update their Nvidia drivers.
-
2. Unaffiliated Programs
Your computer’s third-party security software may occasionally prevent the installation of new driver files by labeling them as threats.
Fix: Nvidia driver install failed Windows 11/ 10
-
Method 1: Install the Drivers Manually
This fix will be especially helpful for customers who recently installed Windows 10 and attempted to install their graphics driver for the first time but received the error message “Nvidia Installer failed.” If you adhere to the installation instructions provided below, performing a custom installation is incredibly simple.
Wait for the Nvidia Installer to launch itself after selecting “Run as administrator” from the context menu when you right-click on the file.
As the installer verifies that your system is compatible, wait. Clicking the “Agree and Continue” button signifies your acceptance of the Nvidia software licensing agreement. Select “Custom” from the list of installation choices, then press “Next.”
Select the “Perform a clean installation” option under Custom installation settings, then click “Next” to continue. Wait for your computer to install the graphics driver. Click the “Close” button to end the installation process after the “Nvidia Installer has completed” message appears.
-
Method 2: Deactivate security programmes
Your computer’s security software may occasionally prevent the download and installation of fresh driver files. Due to the security program’s perception that the driver files are hazardous to your system, this may result in the “Nvidia Installer failed” problem.
However, you may quickly fix this issue by briefly turning off your computer’s security software. Then, after upgrading your driver, you can turn those applications back on.
In the menu that appears when you right-click the “Windows Taskbar,” select “Task Manager.” Locate the antivirus process that is now active on your computer, right-click it, and then select the ‘End task’ option from the context menu that appears.
Apply this to any security applications currently active on your computer, such as firewall, antivirus, and anti-malware software. Try installing the Nvidia drivers as specified in Method 1 after turning off all third-party security software currently installed on your computer.
-
Method 3: Stop all NVIDIA processes and files from running
On occasion, the Nvidia software and processes already installed on your computer might obstruct the installation of fresh driver files. By removing the Nvidia files and pausing the Nvidia processes on your computer before you begin the installation of Nvidia drivers, you may quickly fix this issue. Take the actions outlined below.
You must first remove the listed files from their respective directories, which are shown below. Do not remove any other files or folders; just the ones that have been listed should be deleted.
- In ‘C:\Windows\System32\DriverStore\FileRepository’ delete ‘nvdsp.inf’ file
- In ‘C:\Windows\System32\DriverStore\FileRepository’ delete ‘nv_lh’ file
- In ‘C:\Windows\System32\DriverStore\FileRepository’ delete ‘nvoclock’ file
- In ‘C:\Program Files\NVIDIA Corporation\’ delete ALL files
- In ‘C:\Program Files (x86)\NVIDIA Corporation\’ delete ALL files
- In ‘C:\Program Files (x64)\NVIDIA Corporation\’ delete ALL files
You should restart your computer after removing all the files stated in Step 1 and then adhere to the instructions below. Right-click the “Windows Taskbar” and select “Task Manager” from the menu that appears.
To terminate the Nvidia process, locate it in the Task Manager’s Processes section, right-click it, and then select “End task.” Follow these instructions for each Nvidia process that is active in your Task Manager.
Try once again to set up Nvidia drivers by going through Solution 1’s installation procedures. Try the following fix if the “Nvidia Installer failed” problem still appears.
-
Method 4: Delete the NVIDIA temporary folder
The Nvidia Installer generates a folder in the Temp folder when installing the driver on your computer. This folder can occasionally be deleted to resolve the “Nvidia Installer failed” issue. However, you need to be the folder’s owner in order to delete the Nvidia folder.
To assign ownership of that folder, follow the instructions below. After that, you should delete that folder.
Open the Run dialogue box by pressing the Win + R keys simultaneously. Type “%temp%” into the box and click the “OK” button. Locate the “Nvidia” folder inside the “Temp” folder, then right-click on it and select “Properties” from the menu. Select the “Security” tab and then the “Advanced” option in Nvidia Properties.
Click the “Change” link next to the “Owner” files in the Advanced Security Settings box. Enter the username you wish to provide access to the Nvidia folder for in the Select User or Group box, then click the ‘Check Names’ button. Press the “OK” button.
Click the “OK” button in the Advanced Security Settings box. Click the “OK” button in the Nvidia Properties box to continue. Right-click the Nvidia folder again and select “Delete” from the menu.
Try putting the Nvidia drivers in place by doing what Method 1 says to do. Continue to the next solution if the “Nvidia Installer failed” problem continues to occur.
-
Method 5: From the extraction folder, install the driver
Before installing the driver files on your computer, the Nvidia Installer creates an extraction folder where it extracts all of the driver files.
That extraction folder with all the driver files is left behind if the installation fails. By using that folder and following the installation instructions provided below, you may manually install Nvidia drivers.
Open the Run dialogue box by pressing the “Win + R” keys on your keyboard, then type “devmgmt.msc” and click the “OK” button. Expand the Display adapters section in the Device Manager window by clicking on it. Then, right-click the “Microsoft Basic Display Adapter” option and select “Update driver” from the menu that appears.
To continue, select “Browse my computer for drivers” in the Update Driver box. Enter the location of the Nvidia extraction folder in the driver location field, then click the “Next” button.
Before beginning the driver installation, the installer displays the location of the Nvidia extraction folder. The address is the same as what is displayed in the picture below by default. Finally, complete the driver installation by following the on-screen directions.
If this approach resolves your issue and you are able to install the Nvidia drivers, the Nvidia Installer programme was the cause of your issue.
-
Method 6: Launch Windows Update again
The “Nvidia Installer failed” problem can occasionally be resolved by upgrading your version of Windows. However, new updates may not load correctly if the Windows Update folder becomes damaged over time.
As a result, before installing Windows Update, you should rename the old Windows Update folders on your computer. This will guarantee that the new update is accurate and well-done.
Use the Windows search to enter “cmd,” then locate and right-click “Command Prompt” in the search results, then select “Run as administrator” from the menu.
To continue, click the “Yes” option in the User Account Control box. Enter “net stop wuauserv” into the command prompt window, then wait for the service to terminate successfully.
One by one, do this for the services “net stop bits,” “net stop msiserver,” and “net stop cryptSvc.” Please be patient as these services successfully terminate.
You should rename the Windows Update folders by executing the commands “ren C:Windows\SoftwareDistribution\SoftwareDistribution.old” and “ren C:Windows\System32\catroot2 Catroot2.old” and clicking the “Enter” key to start them after halting all Windows Update services.
It’s time to restart the Windows Update services now that the Windows Update directories have been renamed. Enter the command “net start wuauserv” once you have typed it. Please wait till the service restarts successfully.
One by one, carry out the instructions for “net start bits,” “net start msiserver,” and “net start cryptSvc.” Watch for the restart of all these services. It’s time to update your Windows now that the Windows Update Services are up and operating once more. Select “Settings” from the menu options after clicking the “Start” button.
Click the “Update & Security” link on the Settings page. Select “Check for updates” from the Windows Update menu. You should restart your computer when Windows has been updated, then attempt installing the Nvidia driver by following the instructions in Method 1.
-
Method 7: Run an SFC scan
Your system files are crucial during the Nvidia driver installation. You may fix the “Nvidia Installer failed” problem if it results from missing or damaged system files by performing the SFC (System File Checker) scan.
Type “cmd” in the Windows search box, right-click “Command Prompt” in the list of results, and choose “Run as administrator” from the menu options. To continue, select the ‘Yes’ option. Input “sfc /scannow” and hit “Enter.”
Hold off until the SFC scan is finished. You need to restart your computer when the SFC scan is finished. Try to install Nvidia drivers using Method 1’s installation procedures once your machine restarts. Try the last solution provided below if you are still getting the “Nvidia Installer failed” problem.
-
Method 8: Install Windows 10 once again
Since none of the aforementioned fixes have been able to resolve your computer’s “Nvidia Installer failed” problem. Reinstalling Windows 10 through its official installation process is the only option remaining.
That’s all for today’s article on (2022) Fix: Nvidia driver install failed Windows 11/ 10. Do check out all the sections and know what you should do. Till then, stay safe and follow us for more upcoming gaming coverage
Follow us on Twitter & like our Facebook page for more post-updates
Check out more NVidia Articles –
-
(2022) Fix: Nvidia Geforce Game Ready Driver installation failed
-
Best Nvidia Filters for Warzone: Season 5 (Rebirth, Caldera & Fortune’s keep)

An experienced gaming content writer who emphasizes on offering the most recent information and how-to tutorials for the trending titles. Being a Hardcore gamer himself, he likes to try an array of games and likes to spend his time exploring them. He likes to unwind by listening to R&B music when he’s not writing about gaming stuff.