
Last updated on January 2nd, 2023 at 05:21 pm
The Nintendo Switch is a fantastic gaming system. It’s not flawless, though, and occasionally something might not function as it should. You can return a defective item to Nintendo for repair or replacement.
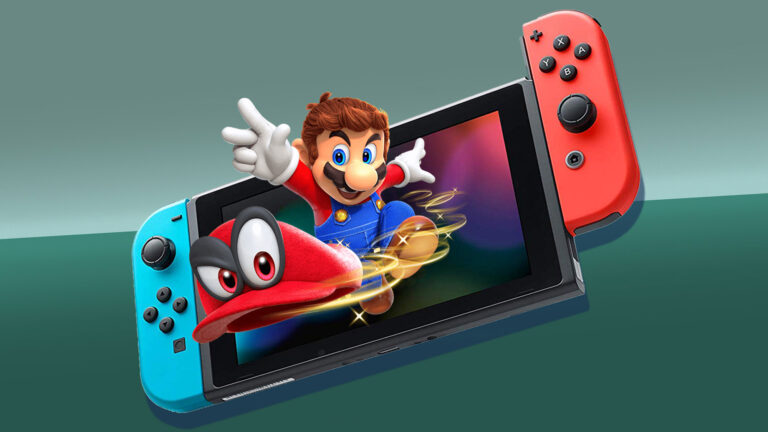
The Nintendo Switch is a fantastic portable gaming system, but it’s also a superb TV-based gaming console for use at home. Of course, the system’s capacity to transition between portable and TV gaming modes is where its name originates.
The technology used by the console engineers was created by combining several interfaces, including HDMI and charging ports.
Some customers, however, could discover that their Nintendo Switch dock is broken. Sometimes the problem manifests as an HDCP issue, while other times the Switch may not be able to produce video. Here’s how to repair your Nintendo Switch dock so that it functions properly once again.
Here is our guide on Fix: Nintendo Switch HDCP error. So, let’s get started.
Why does Nintendo Switch HDCP error occur?
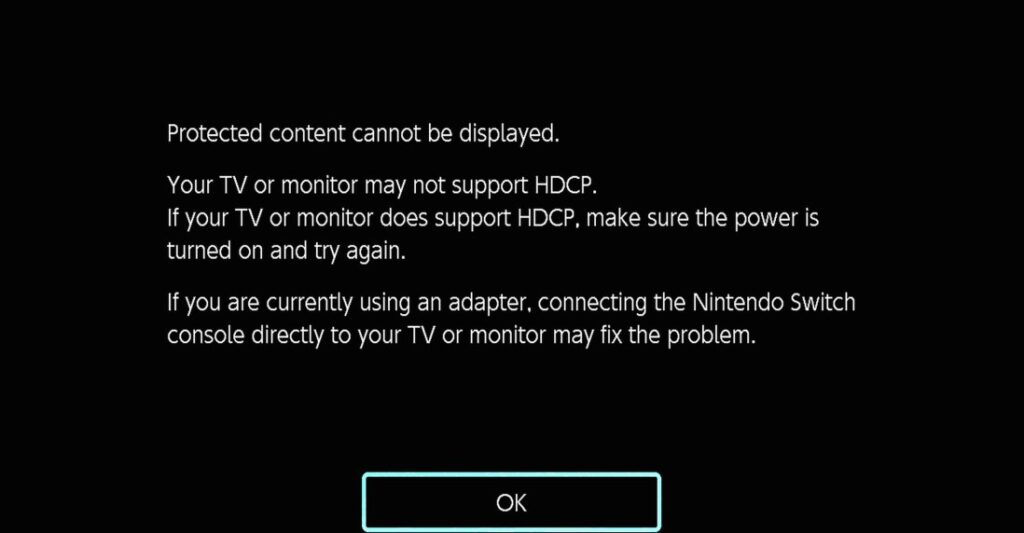
Short Answer: Nintendo Switch HDCP error occurs due to malfunction. It’s possible that you’re using the incorrect cords or that you’ve installed the dock’s wires in the wrong sequence. Nintendo also cautions against assuming that third-party Switch docks would function properly with the device.
You’ll need to conduct some investigation to determine the root of your Switch dock’s malfunction. Although relocating the system or switching cables may cause other problems, the sequence in which the cables are installed appears to be the most frequent one. What you must do is as follows.
Fix: Nintendo Switch HDCP error
-
Method 1: Place the Switch dock cables in the correct sequence
The order in which the dock’s cables are introduced is one of the most frequent causes of Nintendo Switch dock malfunctions. There is a certain sequence to plug everything in, for whatever reason. If you make a mistake, the Switch will still turn on but won’t transmit any signal to the TV.
Unplug all cords before removing the Switch system from the dock. The power wire should be inserted into the wall outlet. Connect the power cord to the dock for the Nintendo Switch. Into the TV, insert the HDMI cable. the dock with the HDMI cord
The Switch console should now be placed within the dock. If you don’t relocate your dock frequently, you should only need to perform this operation once.
If you do, make sure to always relocate the system with all the cables inserted in the correct order. Although the purpose of this is unclear, it generally seems to resolve the issue of missing video.
-
Method 2: In order to prevent power or HDCP issues, use Nintendo cables
Use only genuine Nintendo power and source cords with the Switch dock. The only cables designed to be utilized with the console are the HDMI and power connections included with the device. They not only physically fit the bill, but they also meet Nintendo’s requirements.
Of course, that doesn’t mean that other wires won’t function in theory. An HDMI version 1.4 port, which is already quite outdated technology, is present on the Switch Dock. The majority of relatively new HDMI cables should work.
However, problems with HDCP (high-bandwidth digital content protection) may arise if you use the incorrect HDMI cable. It’s recommended to switch back to the official Nintendo cable if you have trouble playing specific videos or can’t receive any video at all.
If everything else fails, it could be worthwhile to try using an alternative HDMI connection on your TV. This should enable you to confirm that the issue is with the Switch device and not your television set. If not, it’s possible that the issue is with your TV.
-
Method 3: Don’t use third-party docks
When several customers claimed that their systems had abruptly ceased functioning, there was substantial controversy immediately after the Nintendo Switch’s release. It found discovered that some docks from third parties were bricking Switch systems.
Since then, owners have been urged to only use Nintendo Switch docks that have received official approval. That piece of advice is still valid today.
Although third-party docks have improved, there is still no assurance that they will function as intended. Any provided cables may not be capable of handling data adequately, or the power or source connections may not be up to standards.
You should return to using the official Nintendo dock if your Switch won’t operate with anything else. Find a dock that has at the very least received Nintendo’s official endorsement. Even while it may be a bother, it’s the only way to guarantee that the Switch continues to operate as intended.
Basically, you need to double-check all the connections if your Switch dock isn’t working. Use only authentic Nintendo cables and the first-party dock, and be sure you connect everything in the right order. Otherwise, your TV or its HDMI ports might be the cause of the issue.
-
Method 4: Implement a Hard Reset
When it comes to a device like the Nintendo Switch dock, there are many moving parts. Numerous cables and parts are needed. Any of these might malfunction, giving the impression that the dock is broken.
When using technology, the following advice is frequently given: “Have you tried turning it off and on again?” Despite the fact that it can sound cliche, there is a valid reason behind it! You should do a hard reset on your Nintendo Switch dock as soon as you have issues.
This entails taking your Switch and every cable from the dock and reassembling it in the proper sequence. Although you would not believe that inserting the cables in a specific sequence would be helpful, there are occasions when doing so will be all that is required to fix your Nintendo Switch dock.
After removing all the cords from your Nintendo Switch dock, put it back together in the following order:
Connect the power cord to the wall. Connect the power cord to the dock for the Nintendo Switch. Then, connect the HDMI OUT end of the HMDI cable to your display. Connect the HDMI cord’s HDMI IN end to the dock for your Nintendo Switch. Place the Switch console inside the dock.
If everything is connected according to the above instructions, the dock should begin to receive electricity and begin showing the image on your monitor. The majority of new Nintendo Switch owners have mentioned this problem.
-
Method 5: Utilize the elimination process
It is a good idea to test out all potential causes to narrow down your problem if hard resetting your Nintendo Switch dock does not solve the problem. For instance, one of your cords could be broken, which is far simpler to remedy than fixing or replacing the dock entirely.
To identify the problem, test each of your parts individually. First, see whether your Switch begins to charge by plugging the power line straight into the wall. If your power cord functions properly, you can cross that item off your list of things to fix.
To test that your HDMI wire is functioning correctly, plug it into another console. To avoid any potential problems with the HDMI ports on your monitor, make sure you are inserting your cords into the same spot on your TV when doing this. You could be experiencing problems with the dock or your Nintendo Switch if your HDMI cable is functioning properly.
If at all feasible, test your Nintendo Switch with a different dock. If it functions as intended, your Nintendo Switch dock may be experiencing a more significant problem. However, before sending it out for repair, you should verify a few additional items.
-
Method 6: Manual resolution setting
The amazing HDMI technology allowed for cross-platform communications. Back then, I could never have imagined immediately hooking up a portable gadget to the television. The majority of the manual effort is automated by the High-Definition Multimedia Interface, which doesn’t require any additional setup time.
But with contemporary PlayStations, Windows laptops, MacBooks, Linux computers, and other devices, I would agree. Because the dock acts as a bridge between the console and the bigger screen, Nintendo Switch is a unique case. Therefore, you must interfere with the procedure and manually set the TV resolution.
From the dashboard, choose “System Settings.” Select “TV Output” from the menu by sliding down. Choose “TV resolution” from the list of choices.
The program automatically identifies the TV resolution in its default configuration, but you must manually choose the resolution.
- Automatically
- 480p
- 720p
- 1080p
Start with 480p, then switch to 720p, and then manually set 1080p. The complex software that would enable third-party devices to determine the resolution and transmit the data is not present on much older systems. The TV resolution should now be selectable manually, and Nintendo Switch is transmitting the right output signals.
That’s all for today’s article on the Fix: Nintendo Switch HDCP error. Do check out all the sections and know you should know which one is the best for you. Till then, stay safe and follow us for more upcoming gaming coverage.
Follow us on Twitter & like our Facebook page for more post-updates

An experienced gaming content writer who emphasizes on offering the most recent information and how-to tutorials for the trending titles. Being a Hardcore gamer himself, he likes to try an array of games and likes to spend his time exploring them. He likes to unwind by listening to R&B music when he’s not writing about gaming stuff.