

Last updated on January 2nd, 2023 at 05:28 pm
NVIDIA Control is a piece of software designed by Nvidia for managing their hardware. In addition to the graphics driver, the user will also get a graphical interface.
If your computer’s integrated graphics card is controlling some parts of the display settings, you may get the Nvidia Control Panel not showing all options issue.
The numerous remedies to aid in resolving this problem are provided below for your convenience.
Why is Nvidia Control Panel not showing all options?
Short Answer: The Nvidia Control Panel is not showing all options because of an obsolete graphics driver, the integrated graphics processor is chosen by default in BIOS, or there are glitches in the Nvidia Control Panel.
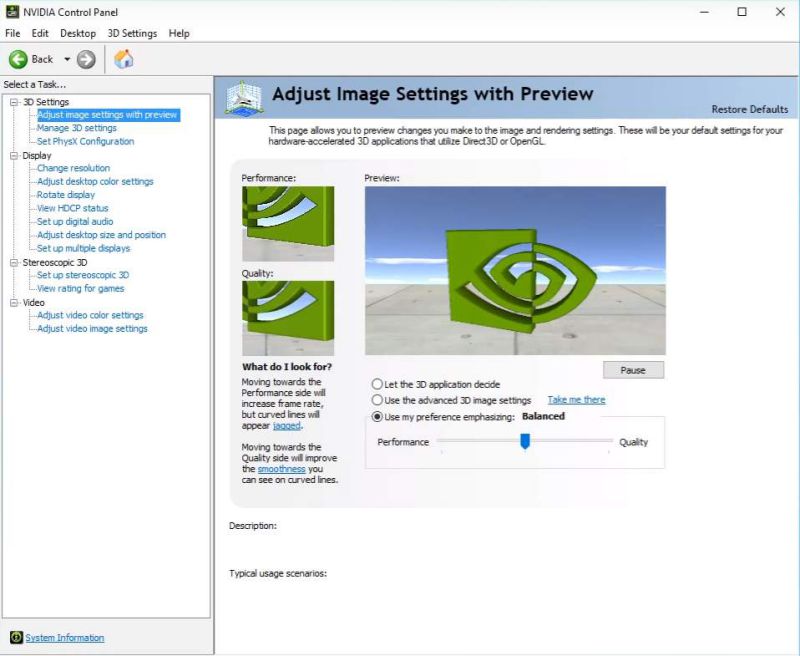
You can see what the Nvidia Control Panel should look with all the settings in the picture above.
The integrated graphics card in your computer might be the root of this issue, albeit it isn’t the only possible culprit.
Once you narrow down the root problem to one of the following, you can usually fix it quickly and easily.
This problem may be related to the use of an obsolete graphics driver. They should be updated as soon as feasible.
Changing the BIOS default setting to deselect the integrated graphics processor might solve a variety of issues.
It is recommended that you try restarting the NVIDIA Control Panel since the software may just be flawed.
Fix: Nvidia Control Panel not showing all options
Method 1: Obtain the latest drivers for your Graphics Card.
The Nvidia settings menu may hide certain features under certain circumstances.
This malfunction is caused by obsolete software used to regulate the graphics hardware.
The following procedures will update the graphics driver and fix the problem.
-
Step 1: Navigate to the control panel from the Start menu
The system’s Start menu allows you to navigate to the control panel.
-
Step 2: Launch the device manager from the operating system’s control panel.
-
Step 3: Choose the NVidia graphics card driver from under display adaptors.
-
Step 4: Right-click on the symbol representing the graphics driver
If the user right-clicks on the symbol representing the graphics driver, a new window will pop up, where the drivers may be updated.
The user has the option of having the system automatically seek new driver software or manually selecting the appropriate update file.
In the case of an automated update, the computer will download and install the patch without any more intervention from the user.
Method 2: Reinstall the graphics driver software.
The following steps will help you fix the Nvidia Control Panel only shows 3D settings laptop problem by removing and reinstalling your graphics drivers.
-
Step 1: Launch the control panel and choose “device manager” from the menu.
-
Step 2: To see the available drivers, choose the display adapters.
-
Step 3: Search for the Nvidia graphics card driver.
-
Step 4: Uninstall the driver
The driver may be uninstalled by right-clicking its icon and selecting the uninstall option.
Please make sure that all of the drive’s previous installations have been deleted.
A system restart is required for the upgraded software to take effect.
-
Step 5: Find and download the graphics driver
Go to Nvidia’s driver download website from your browser and find a graphics driver that works with your operating system.
-
Step 6: Run the setup program and restart the computer
After the download has finished, run the setup program and restart the computer.
Method 3: Relaunch the NVIDIA Control Panel.
If the issue was caused by a straightforward glitch, this solution will fix it.
-
Step 1: Launch the Task Manager
To launch the Task Manager, press and hold the Control (Ctrl) key, the Shift key, and the Escape (Esc) key on your keyboard.
You may also utilize the shortcut key combination of Ctrl + Alt + Del to bring up a blue screen with numerous alternatives, one of which is Task Manager.
The Start menu is another good place to look.
-
Step 2: Extend the Task Manager by clicking on More details
Extend the Task Manager by clicking on More details in the window’s lower left corner, then look for the NVIDIA Control Panel there.
You will find it under Background processes.
-
Step 3: Click on NVIDIA Control Panel, and then choose End task
Click on NVIDIA Control Panel, and then choose End task from the menu that appears in the window’s bottom right corner.
-
Step 4: Restart NVIDIA Control Panel
Upon restarting NVIDIA Control Panel, verify whether the missing settings issue has been fixed.
Method 4: From the Device Manager, deactivate the onboard graphics card.
If you want to change a setting in the NVIDIA Control Panel but can’t find it because it’s managed by your integrated Intel graphics card, you can always utilize the NVIDIA card instead, by deactivating the integrated one.
Unfortunately, although this will address the issue, it may reduce the battery life of your laptop.
To access Device Manager, press the Start button, then enter “Device Manager,” and finally, choose it from the results by selecting the top-ranked item.
Alternatively, you may activate the Run dialogue box by pressing the Windows Key plus the letter R.
Type the command “devmgmt.msc,” into the dialogue box and hit OK.
To upgrade your computer’s video card driver, open the Display adapters tab, right-click on your laptop’s integrated graphics card, and select the Disable Device menu item.
After restarting the computer, check the NVIDIA Control Panel to see if any new options have shown.
Method 5: Manually Accessing the Nvidia Control Panel
To access the NVIDIA Control Panel when the “control panel not showing all options” issue persists after the use of all available workarounds, the user must do the procedure manually.
-
Step 1: Launch My Computer, and then navigate to Local Disk (C).
The Program Files (X86) or Program Files folder may be found at the root of the local disc (C).
If you look in this directory, you’ll see a folder labeled NVIDIA Corporation, and within that, you’ll find another one labeled Control Panel Client.
-
Step 2: Locate the nvcplui file
Locate the nvcplui file by opening the Client folder in the Control Panel.
-
Step 3: Right-click the nvcplui file and choose “Run as administrator”
Right-click the nvcplui file and choose “Run as administrator” to launch it.
When you do, you’ll be sent to a window where you may adjust your graphics settings using Nvidia’s control panel.
-
Step 4: Create a desktop shortcut to the nvcplui file
Simply create a desktop shortcut to the nvcplui file by right-clicking on it and selecting the option to do so.
You can now access the Nvidia Control Panel with a single click from the computer’s desktop.
Method 6: Select the Default Graphics Processor in BIOS
It would be disastrous if your computer relied on its integrated graphics card instead of the NVIDIA one.
The BIOS is where you’ll want to make this adjustment, and it’s really simple to do so.
Even though some people become nervous when tinkering with BIOS settings, you can rest certain that following these steps will not damage your machine.
-
Step 1: Access the BIOS settings
You may access the BIOS settings by hitting the BIOS key once the computer starts up again.
On the boot screen, you should see instructions like “Press __ to enter Setup,” which correspond to the BIOS key.
Other keys exist as well. Common BIOS shortcuts include F1, F2, Del, etc.
-
Step 2: Swap out your integrated graphics card with NVIDIA graphics card
The moment has come to swap out your integrated graphics card with an NVIDIA graphics card as your system’s default.
There are a variety of BIOS firmware tools available from a wide variety of manufacturers, and each has a somewhat different interface for accessing the necessary option.
Therefore, there is no special method for locating it. There are several different titles for the same option, but in most cases, you can find it under the Advanced menu.
To access the “Advanced,” “Advanced BIOS Features,” or an equivalent option inside BIOS, utilize the arrow keys.
There, choose a menu item labeled “North Bridge Configuration,” “Video Configuration,” “Internal Graphics,” or something equivalent.
Search for an option labeled Primary Video Controller, Primary Video Adapter, or Initiate Graphic Adapter to find the correct choice in any section of the BIOS settings screen.
To pick it, press Enter and then select either GFX0 or PEG to utilize a peripheral component interconnect express card, PCI, or AGP.
Depending on how you have your card hooked up to your computer, one of these choices may be better than the other.
-
Step 3: Save your changes
To save your changes, go to the Exit tab and click Exit Saving Changes.
The computer’s booting process will continue after this. Verify whether the issue still exists.
Method 7: Taking Advantage of Nvidia Support
While the aforementioned workarounds may temporarily fix the missing NVIDIA control panel issue, only NVIDIA support can give a long-term fix.
You may fix the missing graphics drive control panel by doing the procedures specified.
-
Step 1: Navigate to the drive where the graphics software is stored.
-
Step 2: Look for the NVIDIA folder
Go to your computer’s Program files directory and look for the NVIDIA folder.
-
Step 3: Find and create a copy of the Display.NvContainer
Find Display.NvContainer in the folder’s contents and create a copy of it.
-
Step 4: To begin, go to “run” and enter shell: startup.
-
Step 5: Paste the Display.NvContainer file and hit enter
Just paste the Display.NvContainer file you copied into the newly created folder and hit enter to apply the changes.
-
Step 6: Choose the properties option
Choose the properties option by performing a right-click on the uploaded file.
-
Step 7: Select the driver software and run as administrator
You can select the driver software from the compatibility section of the Properties menu, and then select run as administrator.
Subscribe to our Youtube Channel. Follow us on Twitter & like our Facebook page for more post-updates.

Abhigyan identifies himself as a tech geek, gaming cognoscenti, and also a connoisseur of music. Unidentified and mysterious phenomena never fail to gather his undivided attention. When not reading about bizarre and perplexing entities across the Universe, he can often be found cheering for his favorite teams in Football.